In the past times, showing photo slides used to be among the most popular social activities. Gatherings of families and friends involved come together in a room to enjoy photos projected onto a screen. In the present day, the term “slideshow” has become ingrained in our everyday language, especially concerning imaging and presentation software.
While physical slides are no longer a common photographic medium, they remain a significant aspect of many family photo collections. Although the era of traditional slide presentations has faded, there is still a crucial need to convert old slides into digital format and organize their images.
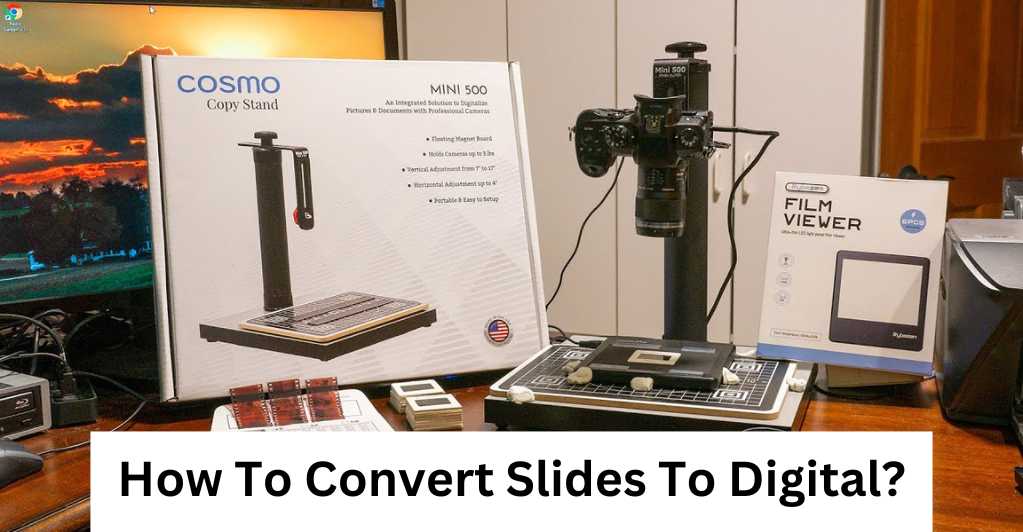
This effort ensures that these precious memories endure, ready to be relished by generations to come. If you are not aware of the procedure and where you have to begin, then this comprehensive guide will help you. Let’s read on to know more: How To Convert Slides To Digital?
What Are Photo Slides?
Photo slides, also known as slides or photographic slides, are transparent pieces of film mounted in individual frames. These frames are typically small and rectangular, often measuring 35mm in width. Each slide contains a positive image of a photograph or artwork, captured through photographic processes.
Slides were commonly used as a visual medium for presentations, educational purposes, and personal sharing before the digital age. They were projected onto a screen using a slide projector, allowing viewers to see the images in a larger format. With the advent of digital photography, slides have primarily been replaced by digital images and presentation technologies.
Different Types of Photos Slides Formats
The commonest type of Photo Slide Format is 35mm. Apart from this, there are various slide formats according to size and other aspects. Here are some of them that you must know:
- Standard 35mm Slide (24mm x 36mm): This is the classic slide format used in traditional film cameras. It has a 2:3 aspect ratio and is widely recognized for its compatibility with projectors and viewers.
- Square Slide (24mm x 24mm): Square slides offer a unique perspective and are often associated with medium format cameras. They can add a distinctive look to presentations or displays.
- Half-Frame Slide (18mm x 24mm): This format yields two smaller portrait-oriented images on a single 35mm slide. It was popular in some older film cameras, allowing users to take twice as many pictures on a roll.
- Digital Slide (various ratios): Digital slides can come in multiple aspect ratios, such as 4:3, 16:9, or 3:2. These ratios are commonly used in modern digital cameras, offering versatility for different screen sizes and presentations.
- Large Format Slide: Larger slides, like 4×5 inches or 8×10 inches, are often used in professional photography and offer enhanced image quality and detail. They require specialized equipment for both capturing and viewing.
- Panoramic Slide: Panoramic slides come in various dimensions but are typically wider than standard formats, offering breathtaking wide-angle views. They are well-suited for capturing landscapes and large scenes.
- Digital Projection Slide: With the transition to digital presentations, slides have transformed into digital images projected onto screens. These can be in various aspect ratios, optimized for the display medium and projector capabilities.
- Online Slideshow Formats: In the digital era, slideshows are commonly created for online sharing. They can have diverse aspect ratios, depending on the platform and device, often ranging from square to wide-screen formats.
Also Read: Things That You Can Do With Old VHS Tapes
Need to Convert Slides to Digital (How To Convert Slides To Digital)
- Less physical storage: Many slides are kept in projection containers, which are large and occupy a lot of room, out of convenience. When you digitize them, you can put them in an archive slide box that is made to protect them. Compared to a projector tray, this is more compact and streamlined.
- A newer version of old formats: Few people today use slide projectors, and numerous of those pictures are no longer available in another form. These photographs can be accessed and shared after being converted to digital.
- Retrieve lost pictures: Digitizing old slides and films can help you to preserve them for future generations. Photographs are simply the memories you save. So if you have a memory and you want to share it with your kids and grandchildren then you can preserve them after their digitisation.
- Deterioration of slides: There are very few people nowadays who use the slide projector. As the slide is nothing more than a thin sheet, it can deteriorate with time and can also become a home to mold and dirt. The moisture of that area increases the chances of such things. It is better to convert them into digital ones and keep the slides safe from these potential risks.
- Risk of damages and loss: The projector containers, which are large and occupy quite a lot of room, are used to hold several slides for ease. You can save them in an archive slide box made for preserving slides once you have converted them to digital form. Compared to a projector tray, this is more organized and compact. This also eliminates the possibility of losses and damages.
Ways to Digitalize Slides Easily (How To Convert Slides To Digital)
This could be a slightly complicated procedure in which DIYs and professional help both can work well. Let’s talk about some of those points as mentioned below:
#1. Slide Scanner: If you choose to do the task on your own then you will definitely need some equipment to do the task effectively. Also, you must have some decent software for eliminating the scratches and cleaning up the scans. The foremost equipment which will be beneficial for this is the slide scanner.
Slides can be swiftly and effectively scanned and digitally preserved with a slide scanner. A slide scanner’s price may be justified if you are converting a large number of slides instead of only one or two. When you are purchasing a slide scanner then you must consider its speed, compatibility, and quality.
#2. Projector and Camera: If you own a projector then this method can work for you. Using the projector, you could digitize your slides by taking pictures of the visuals that are projected. Use a camera with a high resolution and an opaque white backdrop, and ensure sure to maintain a level camera position while standing squarely in front of the slide’s projection.
However, you should be behind the projector. Use a tripod whenever you can to get the best image stabilization. This method could result in poor-quality images as they will just be a photograph of an image.
#3. Flatbed Scanners: These are the general scanners that are used for digitizing photographs and other documents. The slide presentations can be converted into digital formats using the same scanner that you use to digitize texts and photos.
Due to the smaller size and less wealthy quality of slides, this technique only yields photos of middling grades. However, you can convert slides to photographs using this technique without having to buy any additional equipment. In this way, using the flatbed scanner can be an economical option.
Also Read: How To Digitize Film Photos?
Things to Consider When Digitizing Slides
When you are converting the slides into digital format, it may seem like a fun activity but it is not that simple. You will need to keep a lot of things in mind so that the digitization of slides is done efficiently. Here are some points that you will need to consider.
- Quality of Slides: Begin by assessing the condition of your slides. Clean them to remove dust and fingerprints, and repair any physical damage to ensure the best possible starting point.
- Scanner Selection: Choose a high-resolution flatbed or film scanner with the capability to capture fine details. The scanner’s color depth and dynamic range are crucial for reproducing colors accurately.
- Resolution Settings: Opt for a scanner with a high optical resolution (at least 2400 dpi) to capture the finest details. However, consider the trade-off between resolution and file size; extremely high resolutions may result in massive files.
- File Format: Save scanned images in a lossless format like TIFF to retain the highest image quality. JPEG compression can introduce artifacts.
- Color Calibration: Calibrate your scanner and monitor to ensure color accuracy. Utilize color profiles for consistent results.
- Dust and Scratch Removal: Invest in software tools for automatic dust and scratch removal. Adobe Photoshop and specialized software like VueScan offer such features.
- Batch Scanning: If you have a large number of slides, use batch scanning to streamline the process. Ensure consistent settings for each batch.
- Orientation and Cropping: Scan slides in their correct orientation and crop as needed to eliminate excess borders.
Final Takeaways – How To Convert Slides To Digital
Once you have digitized all your slides, then you will see that you have got several ways to share those moments. Digitization of pictures allows you to do many things with them. You can share with them your friends, relatives, and family members.
You can also go for purchasing smart and digital photo frames for storing them. These digital photographs can also be printed using high-quality compact printers. So, now you just have to digitize the slides and keep them preserved for your next generation as well.
Also Read: Is Steam Inhalation Good for Asthma?
FAQs: How To Convert Slides To Digital
Why Should I Convert My Slides To Digital Formats?
Converting slides to digital formats allows you to preserve and easily share your memories in the digital age. Digital images are more accessible, can be easily edited, and are less prone to deterioration over time.
What Techniques May I Employ to Digitize Slides?
There are two main methods: using a dedicated slide scanner or photographing slides with a digital camera equipped with a macro lens. The option is up to you, depending on your budget and desired level of quality. Both approaches offer advantages.
Do I Need Specialized Equipment to Convert Slides?
Yes, you’ll need a slide scanner or a digital camera with a macro lens for capturing detailed images. Additionally, a stable tripod and proper lighting setup can enhance the quality of your conversions.
How Should I Clean and Handle My Slides Before Conversion?
Cleaning slides from dust and fingerprints is crucial for optimal results. Use a gentle microfiber cloth or a specialized cleaning solution to wipe slides. Handle slides by the edges to avoid leaving fingerprints.